
L2TP/IPsec is a popular VPN protocol built-in to most modern platforms including Microsoft Windows 10. Using a built-in protocol can be a good choice as you do not have to install any extra applications or worry if they are written securely and bug free. Depending on your provider’s software they can be a little trickier to set up as you need to manually enter in your VPN configuration.
The following tutorial with plenty of screenshots will show you how to set up a L2TP/IPsec VPN on Windows 10 using the built-in capabilities of the operating system.
L2TP/IPsec Windows 10 setup
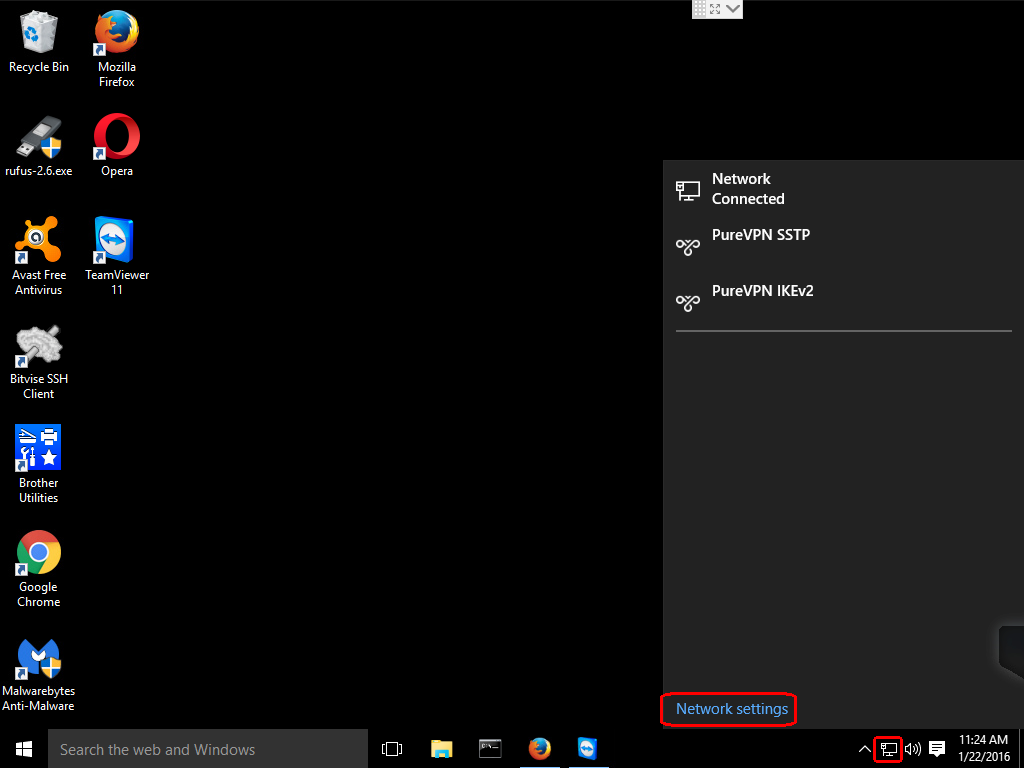
Step 1: Open Network settings
Click on the Network icon on the taskbar and then click on Network settings.
Step 2: Add a VPN connection
Click on the VPN option and then click on the Add a VPN connection.

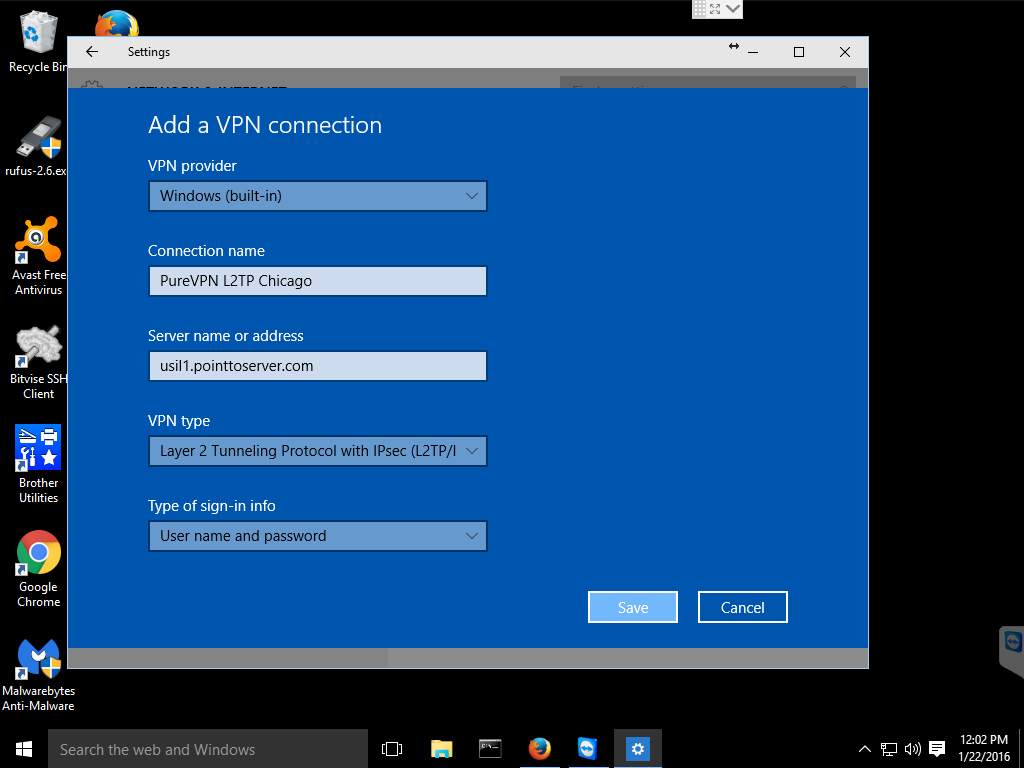
Step 3: Configure VPN connection
- Left-click the VPN provider drop down menu and select Windows (built-in).
- Click on the Connection name box and enter a name for your connection.
- Click the Server name or address box and enter a FQDN or IP address for your VPN server. Your VPN provider should have a list of their servers available on their website.
- Click the VPN type drop down menu and select Layer 2 Tunneling Protocol with IPsec (L2TP/IPsec).
- Click the Type of sign-in info drop down menu and select User name and password.
Step 4: Enter username and password (optional)
You may need to scroll down in the VPN configuration window to see the rest of the options, depending on the size of your Settings window.
If you desire, you can enter your VPN username and password in the appropriate fields and check the Remember my sign-in info and then you will not be asked for this information every time you activate your VPN connection.
When you are done entering all your information, click on the Save button to save your new VPN connection.

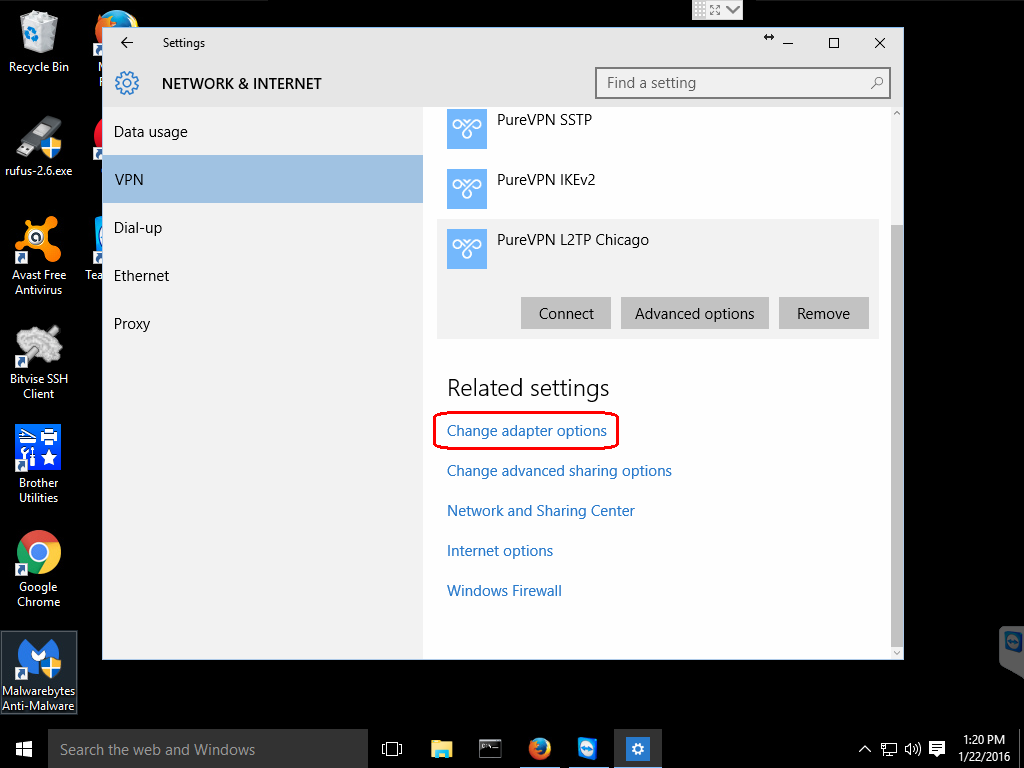
Step 5: Configure advanced settings
Under Related settings click on the Change adapter options choice.
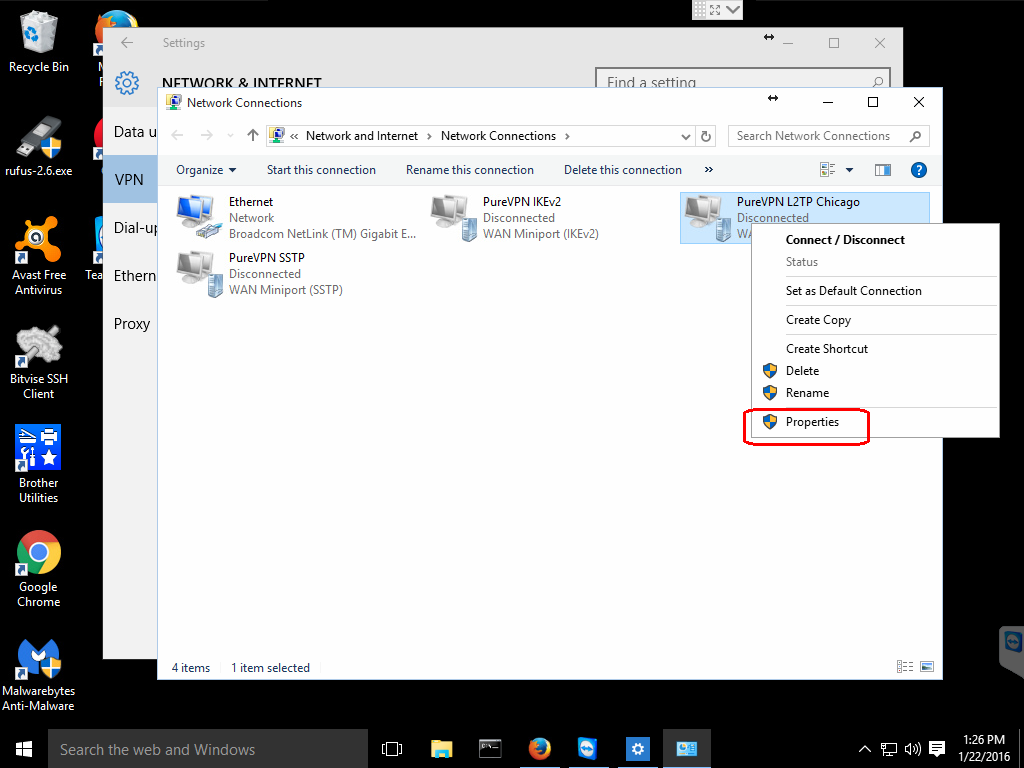
This will open a new window titled Network Connections. Right-click on your newly created connection and this will bring up another menu. Click on the Properties option in this menu.
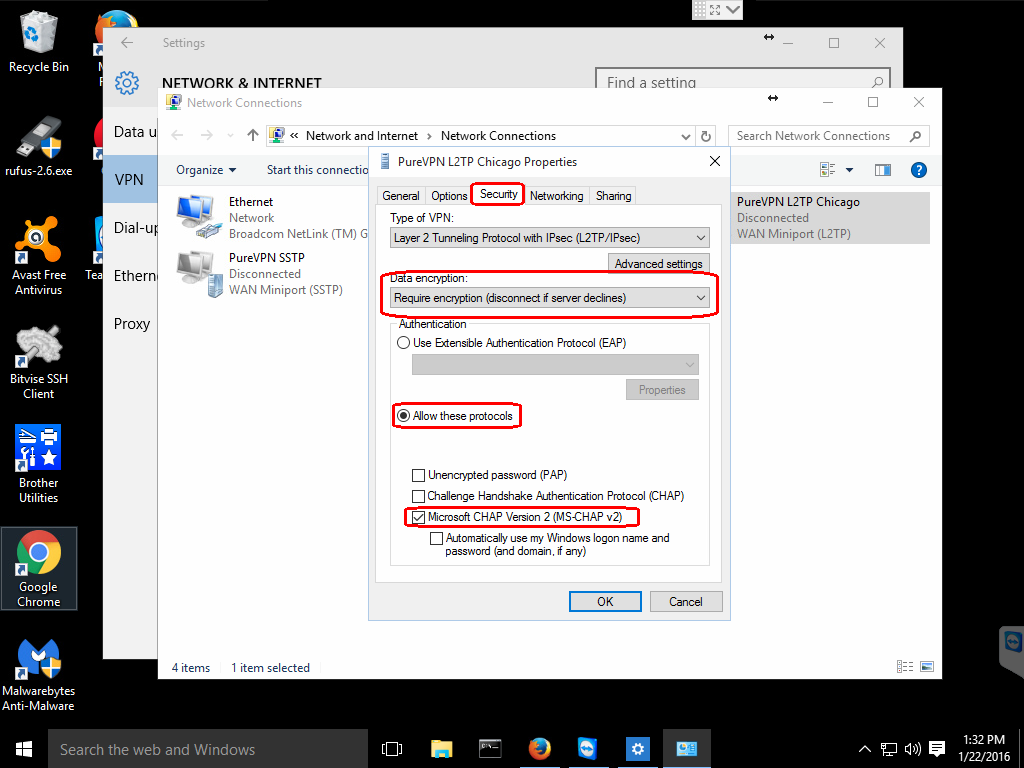
This will open a Properties window for the connection. Select the Security tab in this window.
Under the Data encryption: drop-down menu select Require encryption (disconnect if server declines).
Check the Allow these protocols radio button and ensure that only the Microsoft CHAP Version 2 (MS-CHAP v2) is checked.
There might be cases such as geo-unblocking streaming services where you might not want your connection encrypted. But you would probably be better served by using Smart DNS or some other proxy service for this.
MS-CHAP v2 is the only protocol that is still considered secure.
There is still one more setting that you will need to set for most providers. Stay on the Security tab and click the Advanced settings button.
Once you have the advanced settings open, click on the Use preshared key for authentication radio button and enter the key provided by your VPN provider.
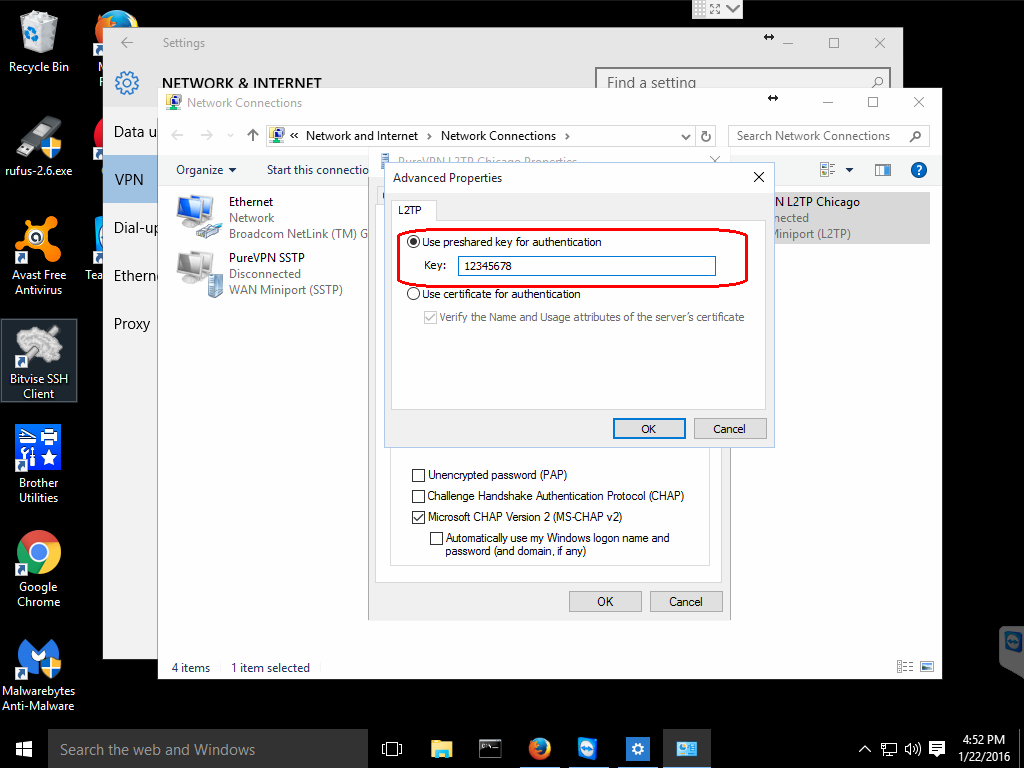
Most providers utilize a preshared key for authentication and this should be provided on their website, possibly in the client area or in the tutorials section.
Click the OK button on the Advanced properties. Then click the OK button on the Security tab.
Step 6: Connect to newly configured VPN
If you like, you can close any of the windows that you still have open from configuring your new VPN connection.
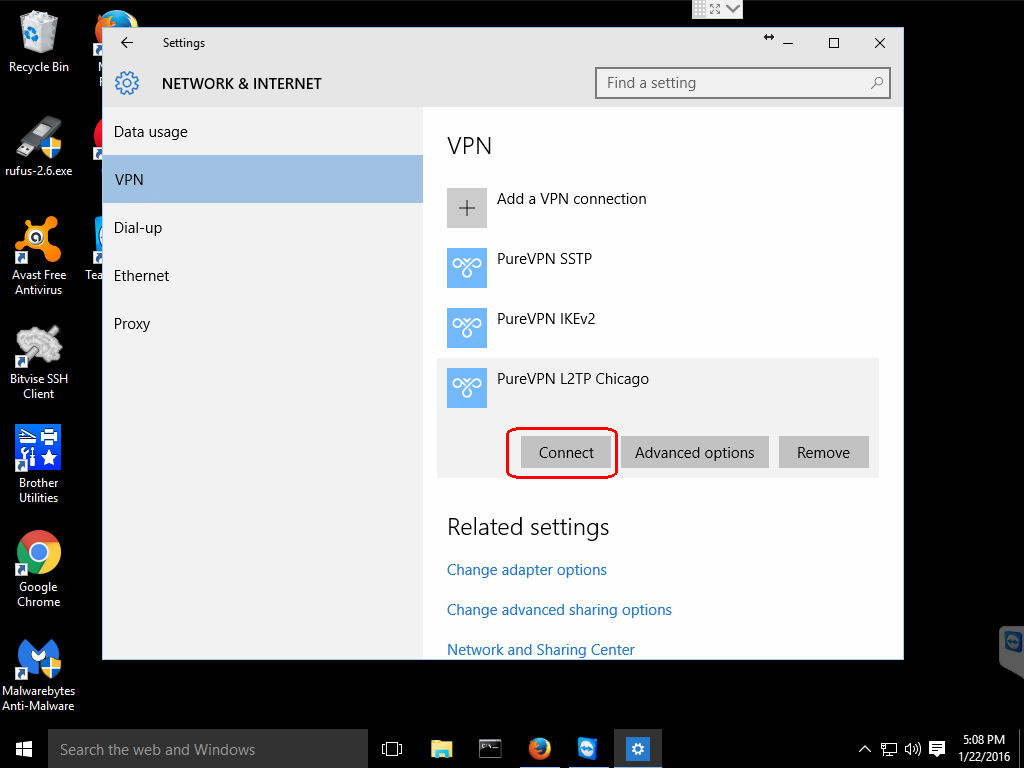
Click on the network icon on the taskbar and this will bring up a list of your configured connections.
Then, click on the name you gave your new configuration and this will bring up the NETWORK & INTERNET settings screen.
After that, click the name of your new configuration and this will reveal three buttons. Click the Connect button.
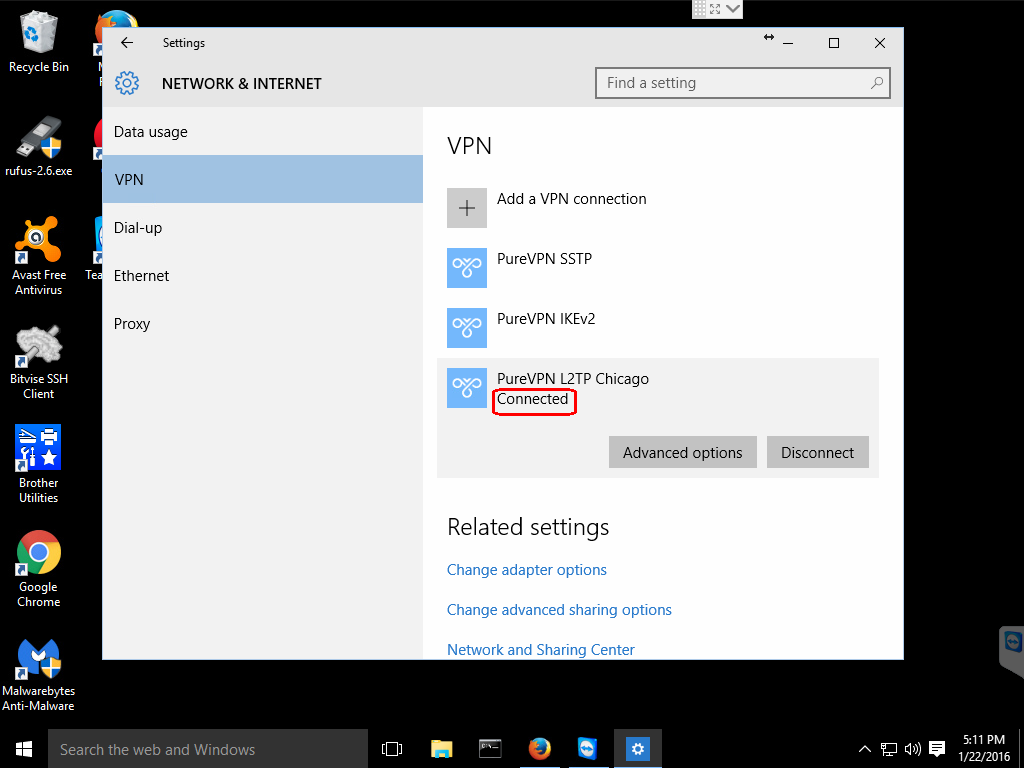
Once you click the Connect button, you will see the Windows 10 spinner and some informative messages and then it should say Connected, if all went well.
It is a good idea to use a tool to check what your IP is, it should now be reported as your VPN server;
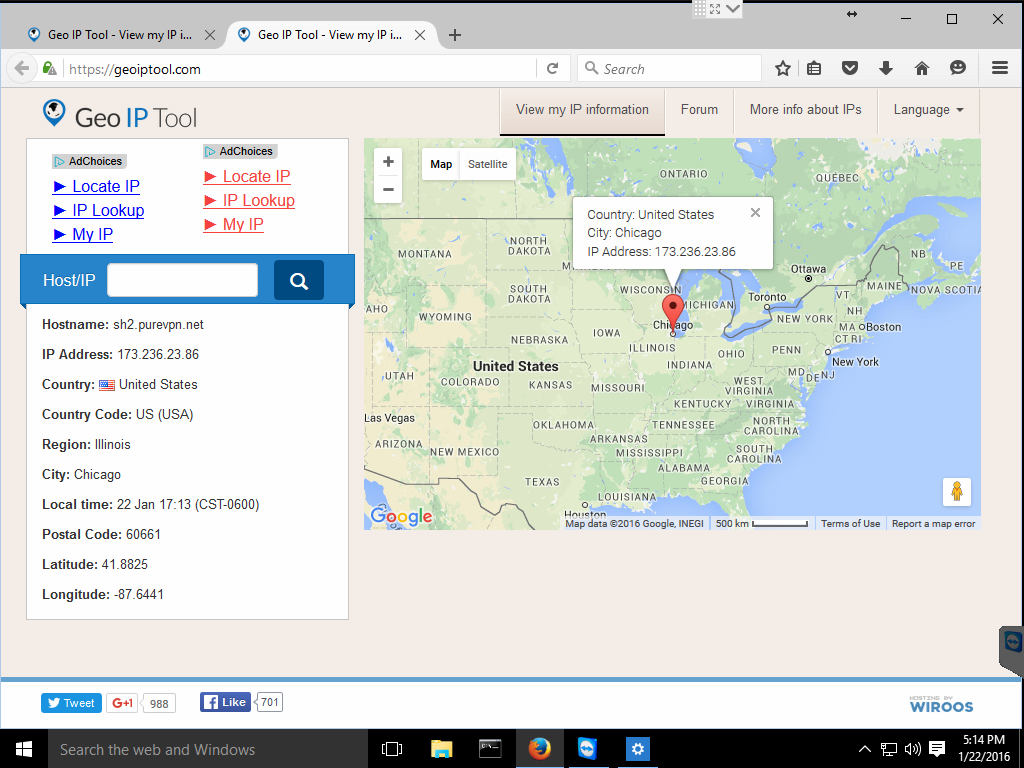
And that is it! I now appear to be coming from the VPN server located in Chicago.
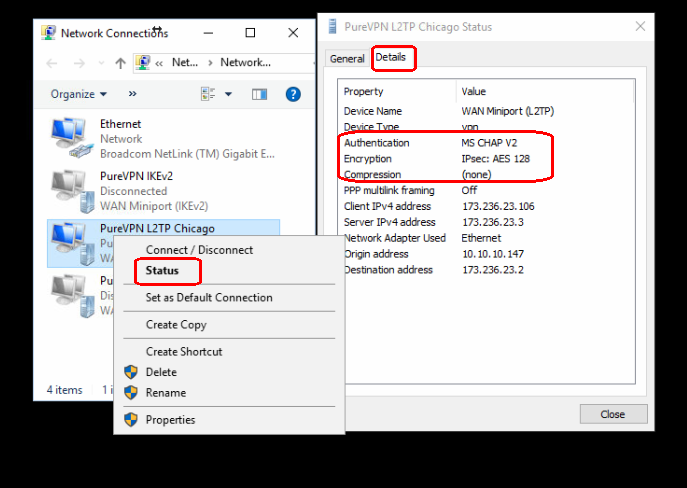
You can also check the network properties to get some information on your connection. Open the NETWORK & INTERNET window again by clicking on the network icon in the taskbar and selecting Network settings.
In the NETWORK & INTERNET window under Related settings select Change adapter options and this will bring up the Network Connections window. Right-click on the icon with the name of your VPN and select Status from that menu.
The General tab has some basic information but if you click on the Details tab you are provided with information about your VPN connection such as the cipher being used.
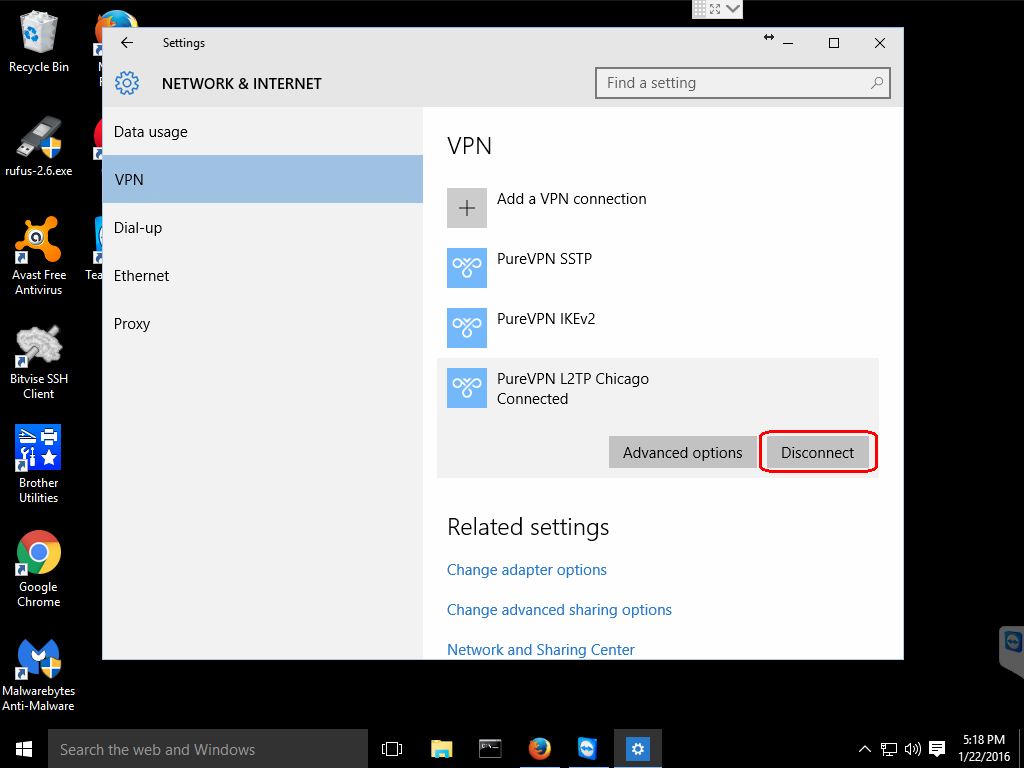
When you wish to disconnect from the VPN, you can click on the network icon and select your VPN connection profile which will bring up the NETWORK & INTERNET setting window again and click the Disconnect button.
That is all there is to setting up a L2TP/IPsec VPN using the built-in Microsoft Windows 10 functionality. I hope you found this tutorial to be useful and are enjoying your new VPN connection.

Hi, thank you for the elaborate guide.
I am getting this error. How can it be fixed? https://i.imgur.com/sjbAr4D.png
Thanks for the great article. VPNs generally offer such technology to paid users, if you want these protocols to be enabled then buy a decent vpn, Purevpn is offering 86% discount on their premium plans
Glad you found the tutorial useful. The PureVPN offer is specifically for Black Friday, though may extend it beyond. We’ve listed all of the biggest VPN Black Friday deals here, including this offer: https://www.bestvpnz.com/deals/vpn-black-friday/